
Desserts
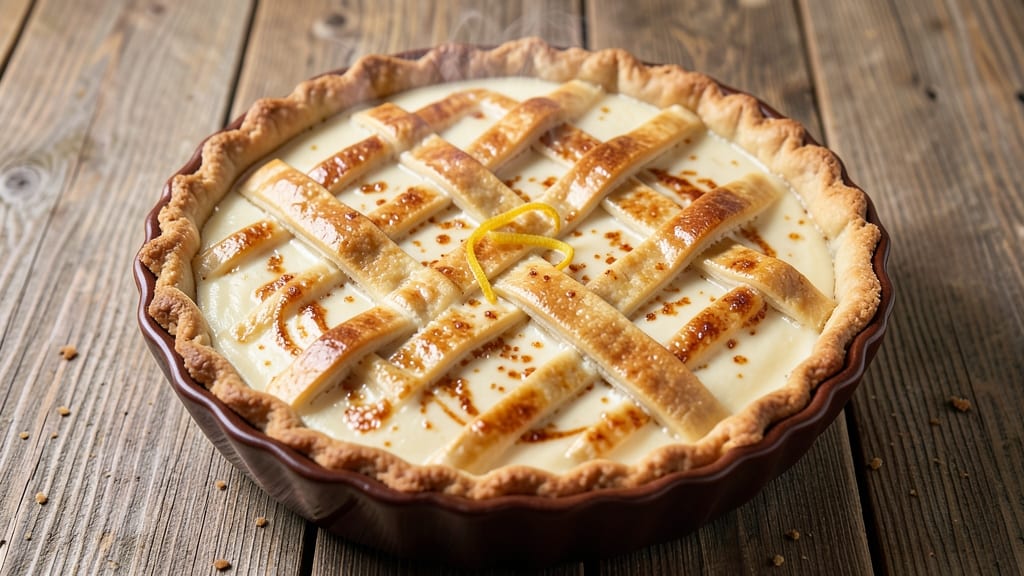
This soul food buttermilk pie recipe delivers the perfect marriage of crispy, golden-brown crust and velvety, tangy filling that’s become a Southern staple. The secret lies in a well-balanced crust—flaky yet sturdy enough to hold the creamy buttermilk filling without crumbling.
I’ve perfected this recipe over years of baking, ensuring every slice offers that signature Southern comfort with just the right amount of crunch and creaminess.
The magic happens in the filling, where buttermilk and eggs create a smooth, rich texture that’s neither too thick nor too runny.
A touch of vanilla and a pinch of salt enhance the natural tang, while the topping transforms into a delightful, crackly crust that contrasts beautifully with the soft filling. This pie isn’t just dessert—it’s a celebration of tradition, a taste of home that brings warmth to any table.
What you’ll achieve is a pie with a golden, shatteringly crisp topping and a silky, tangy filling that melts in your mouth. The aroma alone—warm, buttery, and just slightly sweet—will have everyone gathering around the kitchen.
It’s the kind of dessert that feels like a hug, perfect for family gatherings, holidays, or simply treating yourself to a little Southern indulgence.
Serve it warm with a scoop of vanilla ice cream or a dollop of whipped cream for the ultimate soul food experience. The contrast of temperatures and textures makes every bite unforgettable. Let’s get baking—this pie is worth every moment of preparation.
Ingredients for soul food buttermilk pie
Twelve ingredients transform into Southern soul food perfection—crisp, crackly crust meets velvety buttermilk heaven.
| Ingredient | Amount | Notes |
|---|---|---|
| All-Purpose Flour 🌾 | 2 ½ cups | Sifted for light, flaky crust |
| Cold Unsalted Butter 🧈 | 1 cup | Cubed, high-fat percentage |
| Granulated Sugar 🍚 | ½ cup | White or raw, fine grain |
| Light Brown Sugar 🍚 | ½ cup | Packed, moist texture |
| Buttermilk 🥛 | 1 ½ cups | Full-fat, room temperature |
| Large Eggs 🥚 | 2 whole | Room temperature, beaten |
| Pure Vanilla Extract 🌿 | 1 tbsp | High-quality, no alcohol |
| Salt 🧂 | ½ tsp | Fine sea salt preferred |
| Baking Powder 🍞 | 1 tsp | Aluminum-free for flakiness |
| Ice Water 💧 | ¼ cup | Chilled, for dough handling |
| Powdered Sugar 🍚 | ½ cup | For dusting finished pies |
| Vanilla Ice Cream 🍦 | 1 ½ cups | For serving, optional |
The butter is non-negotiable here—European-style or high-fat American brands like Land O'Lakes or Plugrá melt beautifully for that shatteringly crisp topping. I always grab 2 pounds at a time from Whole Foods or Costco to keep on hand. For the buttermilk, full-fat is essential—it's what gives that signature tang. If you're using powdered buttermilk mix, whisk it with 1.5 cups cold milk for 5 minutes before adding to the filling. The vanilla matters too—Heinz or Nielsen-Massey extracts have the best pure vanilla flavor without artificial aftertastes. And that baking powder? Clabber Girl is my go-to—it's aluminum-free and gives the perfect lift without bitterness.
No buttermilk? Mix 1.5 cups milk with 1.5 tbsp lemon juice or vinegar, let it sit for 10 minutes, then proceed. Running short on vanilla? Almond extract at half the amount adds depth, though it'll taste different. The powdered sugar topping can be swapped for coarse sugar sprinkled with cinnamon if you prefer a spiced finish. For the crust, if you don't have ice water, chill the dough in the fridge for 30 minutes before rolling—it makes all the difference. And that ice cream? Blue Bell or Breyers vanilla are Southern classics, but any good-quality brand works. Pro tip: Let the ice cream soften slightly before scooping to avoid melting all over your pie.
This pie keeps beautifully—3 days at room temperature wrapped tightly in foil, or 1 week refrigerated in an airtight container. For longer storage, freeze the assembled pie (unbaked) for up to 2 months—just thaw overnight before baking. The crust stays crispy when reheated, but the filling is best served warm. I always bake an extra pie—it disappears too fast when company comes over. Store leftovers in individual slices to maintain that perfect crunch-to-creamy ratio with every bite.
Why You'll Love This Recipe
- No-Fuss Crust: I swear by the cold butter cut into flour—it’s that simple. No food processor, no fancy techniques, just your fingers and a few minutes of pressing. The result? A flaky, golden crust that holds up to the creamy filling without turning soggy.
- Buttermilk Magic: That tangy buttermilk isn’t just a filler—it’s the secret. When it bakes, it turns into a silky-smooth custard with just the right bite, while the brown sugar caramelizes into little pockets of soulful sweetness. Honestly, the first bite makes me pause.
- Weeknight or Sunday Supper: This pie is my go-to for lazy evenings or when company drops by. The crust can be prepped ahead, and the filling comes together in one bowl—no last-minute scrambling. Serve it warm with a scoop of vanilla ice cream, and suddenly, you’re hosting.
- Budget-Friendly Stretch: Flour, butter, sugar—these are pantry staples that won’t break the bank. A single pie feeds four heartily, and leftovers? They’re even better the next day, sliced and reheated with a sprinkle of cinnamon. My wallet and my taste buds thank me.
Step-by-step instructions for soul food buttermilk pies
This fusion of crunchy topping and velvety filling comes together with surprisingly simple steps—just a few key techniques make all the difference.
Prepare the Crunchy Topping Base
In a large mixing bowl, combine the 2.5 cups all-purpose flour, 0.5 cup granulated sugar, 0.5 cup light brown sugar, 1 tsp baking powder, and 0.5 tsp salt. Whisk vigorously until the dry ingredients are thoroughly blended—this prevents lumps in the final topping. I like to use a whisk for this step to aerate the flour slightly, which creates that signature crunchy texture.
Next, cut in the 1 cup cold unsalted butter using a pastry cutter or two forks. Work quickly but deliberately, mixing until the butter is evenly distributed as pea-sized pieces throughout the dry ingredients. The butter should look like coarse crumbs with no large clumps remaining. This is crucial—cold butter creates flaky layers when baked, while warm butter would create a dense topping. If the mixture feels too dry, add 1-2 tablespoons of ice water to help bind it together.
Mix the Creamy Buttermilk Filling
In a separate bowl, whisk together the 1.5 cups buttermilk, 2 whole large eggs, 1 tbsp pure vanilla extract, and remaining 1-2 tablespoons ice water (if needed from previous step). The mixture should be smooth and slightly thick—like heavy cream. I always strain this through a fine-mesh sieve to ensure no lumps make it into the filling. This step is where the magic happens for that signature creamy texture that sets soul food pies apart.
Taste the mixture and adjust sweetness if needed. I often add an extra 1-2 tablespoons of granulated sugar at this stage because buttermilk can vary in tartness. The filling should be tangy-sweet with a rich, almost custard-like consistency. Here's the thing—don't overmix after adding the sugar. Just enough to combine completely, then stop. Overmixing develops gluten and can make the filling gummy instead of silky.
Assemble and Bake the Pies
Preheat your oven to 375°F and grease a 12-cup muffin tin thoroughly with butter or nonstick spray. This prevents sticking and makes removal much easier later. Divide the crumbly topping mixture evenly among the muffin cups, pressing down firmly with your fingers. You want each cup to be about ¾ full—this creates room for the filling to rise while still having a substantial topping layer.
Pour the buttermilk mixture evenly over the topping in each cup, filling them to about ½ inch below the top. Here's where it gets interesting: I like to sprinkle a pinch of powdered sugar over each pie before baking. This creates a beautiful caramelized crust on top of the filling that contrasts perfectly with the crunchy exterior. Bake for 25-30 minutes until the tops are deep golden brown and a toothpick inserted comes out clean.
Cool and Serve with Ice Cream
Remove the pies from the oven and let them cool in the pan for 10 minutes. This resting period allows the filling to set slightly while preventing the topping from becoming soggy. I know it's tempting to dig in immediately, but patience here makes all the difference. Transfer the pies to a wire rack to cool completely—about 30 minutes total. The contrast between the warm, creamy filling and cool, crunchy topping is what makes these pies so special.
For serving, dust each pie generously with powdered sugar and serve warm with 1.5 cups vanilla ice cream on the side. The ice cream cuts through the richness of the pie beautifully. I've found that serving these pies at room temperature actually enhances the texture contrast—try it and see for yourself. Each bite should deliver that perfect balance of crispy, crunchy topping with cool, creamy filling that melts in your mouth.
Pro Tips For Making Soul Food Buttermilk Pie
- CHILL THE BUTTERMILK: Cut the buttermilk with 1 tablespoon of cold water before mixing—it’ll make the crust flakier and easier to handle. I learned this the hard way after struggling with a gummy crust; the extra liquid keeps the butter from melting too fast.
- CUT BUTTER IN SMALL BITS: Use a pastry cutter or two knives to work the cold butter into the flour until you see pea-sized lumps, not paste. Overworking turns the dough into a sad, greasy mess—keep it rough and uneven for that perfect crumbly texture.
- DON’T OVERMIX THE FILLING: Stir the brown sugar and granulated sugar into the buttermilk just until combined—lumps are fine, even desirable. Overmixing makes the filling dense and turns the pie into a sad, heavy slab instead of a light, cloud-like center.
- BAKE LOW AND SLOW: Preheat the oven to 350°F (not higher) and bake the pie on the lower rack for the first 20 minutes. This prevents the crust from burning before the filling sets, and trust me, nobody wants a crispy bottom with a gooey middle.
Perfect pairings for this recipe
Classic Southern Servings
Serve these soul food buttermilk pies warm with a generous scoop of vanilla ice cream—the contrast of cold cream against the warm, tangy filling is pure Southern magic. I always use Blue Bell or Breyers for that authentic buttery richness.
For an extra touch, sprinkle crushed pecans over the ice cream before scooping—it adds a delightful crunch that complements the pie's crunchy topping. 🥛
Coffee Pairings
A cup of strong black coffee cuts through the sweetness beautifully, especially if you've added a pinch of cinnamon to the pie's topping. I recommend a Southern-style coffee like Folgers or Maxwell House, brewed just a little stronger than usual.
The bitterness of the coffee balances the pie's richness, creating a perfect harmony of flavors. For an iced twist, serve with sweet tea—the natural sweetness enhances the pie's tangy notes without overpowering them.
Fruit Complements
Add fresh peaches or berries on the side to brighten the dish. Sliced peaches (especially in summer) add juicy sweetness that contrasts the pie's tang, while strawberries or blueberries bring a burst of freshness.
I like to macerate the fruit with a splash of lemon juice and sugar for 10 minutes before serving—it intensifies their natural flavors. This pairing works especially well during summer gatherings when fruit is at its peak.
Spiced Variations
For a fall twist, dust the pies with cinnamon and nutmeg after baking—just ½ teaspoon of each per pie. The warm spices deepen the flavor profile, making it perfect for Thanksgiving or Christmas desserts.
Pair with pumpkin spice latte for a cozy, seasonal treat. If you prefer something lighter, try vanilla bean ice cream instead of plain vanilla—it adds subtle floral notes that elevate the pie's natural sweetness.
Dessert Plating
For an elegant presentation, arrange the pies on a wooden board with the ice cream in a small bowl nearby. Garnish with a sprig of fresh mint or a drizzle of caramel sauce for visual appeal.
Serve with whipped cream in a squeeze bottle—guests can add it themselves for a fun, interactive touch. The rustic presentation makes these pies feel even more special, perfect for family dinners or holiday feasts. 🍽️
Nutrition facts
Frequently asked questions
Why does this buttermilk pie need to cool before serving?
Cooling for 10 minutes in the pan and 30 minutes on a rack is crucial—it lets the filling set properly while keeping the topping crisp. The contrast between warm filling and cool topping is what makes these pies irresistible. Serving too soon makes the topping soggy and the filling runny.
Can I make this recipe without buttermilk?
Yes! Mix 1.5 cups milk with 1.5 tablespoons lemon juice or vinegar, let sit for 5 minutes until thickened, then use as directed. For extra tang, add ½ teaspoon extra vanilla extract. The texture will be slightly different but still delicious.
How do I store leftovers to keep the topping crisp?
Store cooled pies in an airtight container at room temperature for 3 days or refrigerate for 1 week. To reheat, cover with foil and warm at 350°F for 10 minutes—this revives the crunch without drying it out. For longer storage, freeze unbaked pies for 2 months.
What's the secret to a perfectly crisp topping?
Use cold butter cut into pea-sized pieces and handle the dough minimally. The 375°F oven temperature and baking for 25-30 minutes until deep golden brown create that signature shatteringly crisp texture. Don't overmix the dry ingredients either—this prevents a dense topping.
Can I make individual pies or should I use a pie dish?
This recipe is designed for 12 individual pies in a muffin tin, but you can adapt it for a 9-inch pie dish by doubling the recipe. For a single pie, multiply all ingredients by 4 and bake at 350°F for 45-50 minutes. The muffin tin version gives everyone their own perfect portion!