
Desserts
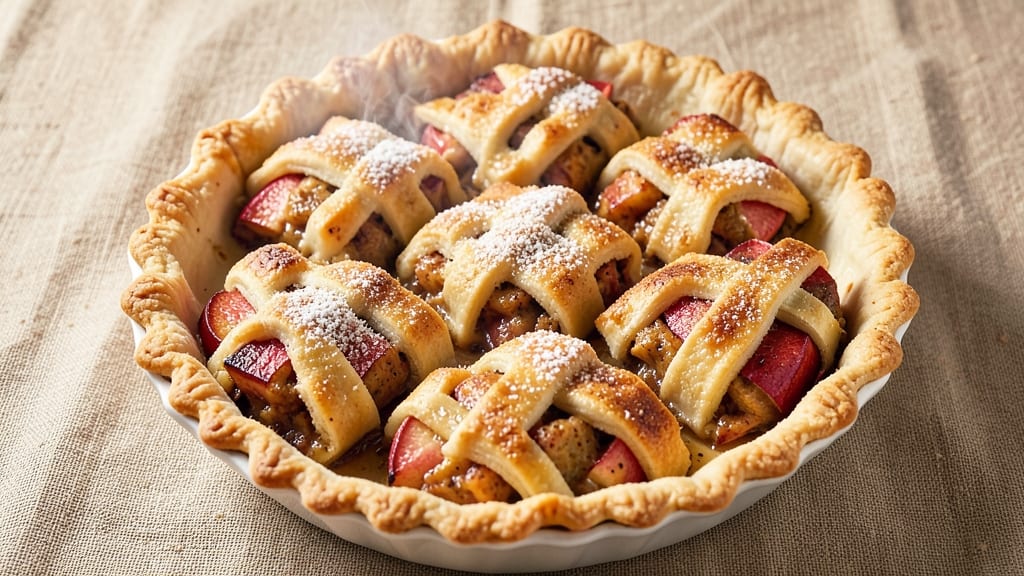
This snickerdoodle apple pie bites recipe delivers the cozy flavors of apple pie with the nostalgic cinnamon-sugar crunch of snickerdoodles—all in bite-sized portions perfect for gatherings or satisfying cravings.
The secret lies in combining a tender pie crust with spiced apples and a signature cinnamon-sugar topping, creating a dessert that feels indulgent yet approachable. What makes this recipe special is its versatility: serve warm as an appetizer, pack for potlucks, or enjoy as a single-serving treat.
The process begins with a simple pie dough that doubles as both crust and wrapper for the apple filling. You'll mix it with a quick spiced apple mixture that stays tender while baking, then roll out the dough to create individual cups.
After filling and baking, the cinnamon-sugar coating transforms these into irresistible mini desserts with crisp edges and soft centers. The result is a dessert that captures the essence of fall in every bite, with the perfect balance of sweet, spiced, and buttery flavors.
By the end, you'll have a tray of golden-brown pie bites that look as impressive as they taste—ideal for holiday gatherings or spontaneous dessert cravings. The recipe scales easily, making it perfect for parties or meal prep.
Each bite delivers the comforting flavors of apple pie with the playful twist of snickerdoodle, proving that great desserts don't require hours in the kitchen. Ready to create something magical in just 30 minutes?
These mini desserts are especially versatile—serve them warm with vanilla ice cream or whipped cream for extra indulgence, or pack them in jars for gift-giving. The combination of warm spices and tender apples makes this a standout dessert that feels both nostalgic and fresh. Let's get baking!
Ingredients for snickerdoodle apple pie bites
Twelve simple ingredients transform into magical mini desserts with apple pie and snickerdoodle magic.
| Ingredient | Amount | Notes |
|---|---|---|
| All-Purpose Flour 🌾 | 2 cups | Sifted for light texture |
| Unsalted Butter 🧈 | 1 cup | Cold, cubed for dough |
| Granulated Sugar 🍚 | ½ cup | Plus 2 tbsp for cinnamon mix |
| Brown Sugar 🍚 | ¼ cup | Packed, for dough sweetness |
| Large Eggs 🥚 | 1 whole | Cold for best texture |
| Apples 🍎 | 4 medium | Honeycrisp or Granny Smith, peeled |
| Ground Cinnamon 🌿 | 2 tbsp | Plus extra for rolling |
| Ground Nutmeg 🌿 | ½ tsp | Freshly grated preferred |
| Ground Ginger 🌿 | 1 tsp | For warm spice depth |
| Salt 🧂 | ½ tsp | Fine sea salt preferred |
| White Sugar 🍚 | ½ cup | For cinnamon-sugar coating |
| Vanilla Extract 🥛 | 1 tsp | Pure vanilla preferred |
| Lemon Juice 🍋 | 1 tbsp | Freshly squeezed |
The apples are non-negotiable here—Honeycrisp or Granny Smith hold their shape while staying tender. Local farmers markets often have the best selection, but any grocery store's produce section works. Peel them first to keep these bites clean and elegant. For the dough, butter matters: grab unsalted from Whole Foods or Trader Joe's for the creamiest texture. The cinnamon should be fresh—if it smells like dust, toss it. I always buy extra and keep it in a dark glass jar to preserve that warm, spicy aroma.
No vanilla extract? Vanilla bean paste works perfectly—just use half the amount. Short on apples? Substitute with 3 cups diced pear, but add a pinch more cinnamon. The dough can be made ahead and chilled for up to 48 hours—perfect for stress-free baking. For a gluten-free twist, swap the flour for a 1:1 gluten-free blend. The lemon juice keeps those apples from browning while adding just the right brightness. If you're making these for a crowd, double the cinnamon-sugar mix—it disappears fast!
Store unbaked dough scraps wrapped tightly in plastic for 3 days in the fridge. Baked bites keep at room temperature for 2 days in an airtight container, or freeze for 3 months—perfect for holiday gifting. Reheat frozen bites at 350°F for 8-10 minutes to restore that warm, gooey magic. I always pack extras in mini mason jars for potlucks—everyone loves grabbing one straight from the jar!
Why You'll Love This Recipe
- No-Roll Required: I swear by this dough trick—just mix the flour, brown sugar, butter, and egg until it clumps. No stand mixer, no chilling time, just press-and-bake. Honestly, my kids think I’m some kind of baking ninja, but it’s all that butter holding it together.
- Cinnamon Sugar Magic: That snickerdoodle spice mix isn’t just for cookies—it’s the star here. The bites get a crispy, caramelized crust from the brown sugar, then a dusting of cinnamon sugar so good you’ll want to eat them straight from the pan. (Yes, even on a Tuesday night.)
- Party in a Bite: These are my go-to for potlucks, game days, or when I need dessert that doesn’t scream “homemade pie.” They’re handheld, shareable, and look fancy enough to impress. Between us, they disappear faster than my willpower at a bakery.
- Budget-Friendly Leftovers: Flour, butter, sugar—these are pantry staples that won’t break the bank. Plus, the dough keeps for days, so I can bake a batch and freeze them. Reheat in the oven, and they taste like they just came out. My wallet and my sweet tooth thank me.
Step-by-step instructions for snickerdoodle apple pie bites
Here's how to create these irresistible mini desserts with perfect spiced apple filling and buttery snickerdoodle crust.
Prepare the Apple Filling
Peel and core the 4 medium apples, then slice them into ¼-inch thick pieces. Toss the apple slices with the 1 tablespoon lemon juice to prevent browning and preserve their fresh flavor. In a medium bowl, combine the apples with the 0.5 cup granulated sugar, 0.25 cup brown sugar, 2 tablespoons ground cinnamon, 0.5 teaspoon ground nutmeg, 1 teaspoon ground ginger, and 0.5 teaspoon salt. Mix gently but thoroughly so every apple slice is coated in the spiced sugar mixture.
Here's the thing—don't skip the lemon juice. It brightens the apples and balances the sweetness of the sugars. The spices should smell warm and inviting as you mix. This filling is the heart of your pie bites, so take your time getting it right.
Make the Snickerdoodle Dough
In a large mixing bowl, combine the 2 cups all-purpose flour (sifted), 0.5 teaspoon salt, and 1 teaspoon baking powder. Cut in the 1 cup cold unsalted butter using a pastry cutter or your fingers until the mixture resembles coarse crumbs with pea-sized butter pieces. Add the 1 whole large egg, 1 teaspoon vanilla extract, and mix just until the dough comes together.
I like to press the dough into a disk, wrap it in plastic, and chill for 30 minutes before rolling. This ensures the butter stays cold and the dough handles easily. If your kitchen gets warm, chill it longer—up to 1 hour—to prevent the butter from melting.
Roll and Cut the Dough
Preheat your oven to 375°F and line two baking sheets with parchment paper. On a lightly floured surface, roll out the chilled dough to ¼-inch thickness. Use a 2-inch round cutter to cut out 24 circles—you should get exactly 24 from the dough. Place them on the prepared baking sheets, spacing them 1 inch apart.
Here's where it gets fun—brush each dough circle with a little egg wash (beat the 1 whole large egg with 1 tablespoon water for this). Then roll each circle in a mixture of 0.5 cup white sugar and 2 tablespoons ground cinnamon. The sugar will stick to the egg wash, creating that classic snickerdoodle coating.
Assemble and Bake the Pie Bites
Place 1 teaspoon of the prepared apple filling in the center of each snickerdoodle dough circle. Gently fold the dough over the filling to create a half-moon shape, pressing the edges lightly to seal. Place the assembled bites on the baking sheets, seam-side down. Bake for 18-22 minutes until the edges are golden brown and the filling is bubbling slightly.
Don't overbake—they should be tender, not firm. The filling should be soft and slightly caramelized, with a warm cinnamon aroma filling your kitchen. If the tops aren't brown enough after 18 minutes, broil for 1-2 minutes to add color, but watch closely to avoid burning.
Cool and Serve
Let the pie bites cool on the baking sheets for 5 minutes before transferring them to a wire rack. Serve them warm—the filling will be gooey and the crust will be tender with a crisp edge. These bite-sized treats are perfect for parties, potlucks, or even as a special dessert after dinner.
Real talk: these are even better the next day when the flavors have melded together. Store any leftovers in an airtight container at room temperature for up to 3 days. The cinnamon-sugar coating stays crisp, and the apple filling becomes even more flavorful as it rests!
Pro Tips For Making Snickerdoodle Apple Pie Bites
- CHILL THE DOUGH FIRST: These bites need to hold their shape, and cutting into warm dough makes them crumble into sad little piles. Wrap the dough in plastic and refrigerate for at least 30 minutes—yes, even if you’re impatient like me. The cold butter will behave, and your bites will stay intact when baking.
- WEIGH THE BUTTER: Packed vs. scooped butter makes a real difference here. Use a kitchen scale for the ½ cup unsalted butter—pack it tightly into the measuring cup first, then level it off. I learned this the hard way when my first batch turned out greasier than intended.
- DON’T OVERMIX THE FILLING: The apple mixture should look like a rustic, uneven mash—not a smooth paste. Overworking it releases too much juice, which makes the bites soggy. Toss the diced apples with spices and sugar, then just barely fold in the brown sugar—lumps are fine, texture is everything.
- BAKE IN STAGES: Start at 375°F for 12 minutes to set the crust, then drop to 350°F for the last 8–10 minutes. This prevents the edges from burning while the centers cook through. I was skeptical until I tried it—now it’s non-negotiable for even baking.
Storing and reheating your leftovers
Room-Temp Storage
These bite-sized treats stay fresh at room temperature for 2 days in an airtight container with parchment paper between layers. The cinnamon-sugar coating stays crisp while the apple filling maintains its tenderness.
I like using glass pie dishes with lids for easy stacking and serving. For extra protection, place a paper towel on top to absorb any moisture. 💫
Fridge Preservation
If you need to store them longer, the fridge extends freshness to 5 days. Let them cool completely before transferring to an airtight container—this prevents condensation that could make the crust soggy.
I wrap individual bites in parchment paper before storing to maintain their shape. Reheat in the oven at 350°F for 5-7 minutes to restore that warm, gooey texture.
Freezer Magic
For maximum shelf life, freeze unbaked bites for 3 months or baked bites for 2 months. I use quart-sized freezer bags with the air squeezed out—this prevents freezer burn and keeps the cinnamon-sugar coating crisp.
When ready to enjoy, bake frozen bites directly on a parchment-lined sheet at 375°F for 20-25 minutes until golden. The filling will be perfectly heated through.
Reheating Secrets
For oven reheating, spread bites on a baking sheet and warm at 350°F for 8-10 minutes. The residual heat from the oven helps restore that fresh-from-the-oven crunch. For microwave reheating, use 20-second intervals on low power—this prevents the cinnamon-sugar from turning gummy.
Add a splash of water to the container to maintain moisture in the filling.
Gift-Worthy Packaging
These make fantastic gifts! Package individual bites in mini mason jars or cellophane bags tied with twine. For a festive touch, sprinkle extra cinnamon-sugar on top before sealing. Store in a cool, dark place for up to 3 days before serving.
The presentation makes them feel special while keeping them fresh. Perfect for holiday parties or teacher appreciation gifts! ✨
Nutrition facts
Frequently asked questions
Can I make these without a pie crust?
For a quick version, use pre-made phyllo dough or mini biscuit dough cut into circles instead of pie crust. Roll the dough around the apple filling just like the recipe, but bake for 12-15 minutes instead. The texture will be lighter but still delicious with that signature cinnamon-sugar crunch!
How do I prevent the apple filling from leaking?
Press the dough edges firmly when sealing to create a tight seal. For extra security, chill the assembled bites for 15 minutes before baking—this helps the dough hold its shape. If you notice filling oozing during baking, reduce the oven temperature to 350°F and add 2-3 minutes to the bake time. The filling should be soft but not runny when done.
Can I use canned apples instead of fresh?
Yes, but drain the apples well and pat them dry with a paper towel to remove excess moisture. Use 14.5 oz canned apple pie filling (unsweetened) and reduce the added sugar to 0.3 cup total. The texture will be slightly softer, but the warm spice flavors will still shine through. This works especially well for gift-giving since canned apples stay fresh longer.
What's the best way to serve these?
Warm bites pair perfectly with vanilla ice cream, whipped cream, or a scoop of caramel sauce for dipping. For a festive touch, arrange them on a platter with a dusting of powdered sugar and fresh cinnamon sticks. They're also great chilled in the fridge for 2-3 hours before serving—this makes the cinnamon-sugar coating extra crisp!
Can I make these gluten-free?
Yes! Replace the all-purpose flour with a 1:1 gluten-free baking flour blend like Bob's Red Mill. Add 1 teaspoon xanthan gum to help bind the dough. The texture will be slightly denser, but the flavors remain just as delicious. For the cinnamon-sugar coating, use a gluten-free mix to avoid cross-contamination if needed.