
Desserts
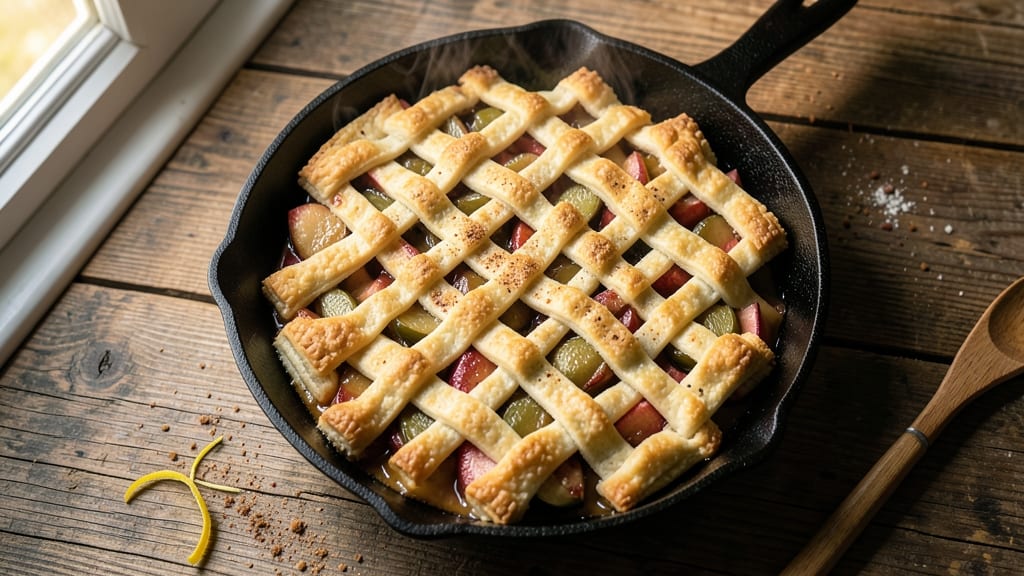
This skillet apple pie biscuits recipe transforms a classic dessert into a rustic, one-dish wonder that combines flaky buttermilk biscuits with spiced caramelized apples.
The secret lies in layering homemade biscuit dough over a warm, bubbling apple filling—creating a golden, crisp-edged masterpiece that bakes straight from cast iron to your table.
I developed this recipe after years of perfecting the balance between tender biscuits and perfectly spiced apples, ensuring every bite delivers that perfect contrast of buttery layers and sweet-tart filling.
The beauty of this dish is in its simplicity: no pie crust to roll out, no lattice to weave—just a cast iron skillet, a few pantry staples, and 30 minutes of hands-on time before baking.
The apples get a head start, simmering in cinnamon and sugar until they soften just enough to release their natural juices, while the biscuit dough comes together with cold butter cut into flour for maximum flakiness. The result?
A dessert that looks impressive but requires no special skills—just patience and a hot oven.
When it emerges from the oven, your skillet will be filled with golden-brown biscuits puffed around the edges, their layers crisp yet tender, cradling a filling that’s caramelized to perfection. The aroma alone—warm apples mingling with buttery biscuits—will have everyone gathering around the table.
Serve it warm with a scoop of vanilla ice cream or a dollop of whipped cream, and you’ll have a dessert that tastes like a hug from Grandma, but with a shortcut that even busy weeknights can handle.
This recipe works equally well for a cozy family dinner or a holiday gathering, scaling easily to feed a crowd. The cast iron skillet ensures even baking and that signature rustic charm, while the biscuit dough can be made ahead and chilled until ready to use.
Whether you’re a seasoned baker or just starting out, these skillet apple pie biscuits deliver restaurant-quality results with minimal fuss—proof that sometimes, the simplest dishes are the most satisfying.
Ingredients for skillet apple pie biscuits
Buttery biscuits, caramelized apples, and warm spices—this skillet dessert needs just 12 ingredients.
| Ingredient | Amount | Notes |
|---|---|---|
| Granny Smith Apples 🍎 | 4 medium | Peeled, sliced into 1/4-inch pieces |
| Unsalted Butter 🧈 | ¾ cup | Cold, cubed for biscuit dough |
| All-Purpose Flour 🌾 | 3 cups | Spooning and leveling for accuracy |
| Granulated Sugar 🍚 | ¾ cup | For filling and biscuits |
| Brown Sugar 🍚 | ¼ cup | Packed, for filling depth |
| Ground Cinnamon 🌿 | 2 tbsp | Freshly ground preferred |
| Ground Nutmeg 🌿 | ½ tsp | Freshly grated nutmeg |
| Salt 🧂 | 1 tsp | Diamond Crystal preferred |
| Buttermilk 🥛 | 1 cup | Room temperature |
| Vanilla Extract 💧 | 1 tsp | Pure vanilla preferred |
| Lemon Juice 🍋 | 1 tbsp | Freshly squeezed |
| Heavy Cream 🥛 | ¼ cup | Optional for extra richness |
The apples are the heart of this dessert, so pick firm Granny Smiths—they hold up best during baking. Trader Joe's and Whole Foods usually carry them year-round, but local orchards in fall are unbeatable. Peel and slice them while you preheat the oven—no waiting around. For the cinnamon, Penzeys or the bulk bins at Whole Foods have the freshest ground spices, but a basic grocery store bottle works fine if it's not dusty. Nutmeg is non-negotiable here—it's what gives that classic apple pie warmth. If you only have whole nutmeg, grate it fresh (just a few turns of the grater).
No buttermilk? Mix 1 cup milk with 1 tbsp vinegar or lemon juice and let it sit for 5 minutes. Short on butter? Coconut oil works in a pinch, though it gives a slightly different flavor. The brown sugar needs to be packed—use a spoon to press it down firmly in the measuring cup. For a deeper flavor, add a pinch of cardamom to the spice mix. The heavy cream is optional but makes the filling extra luscious—skip it if you're watching calories. And if you're using a nonstick skillet, don't grease it—the butter from the biscuits will handle it.
Prep the biscuit dough first, then the filling—it keeps better while you work. Wrap the dough in plastic and refrigerate for up to 2 days if making ahead. The filling can sit at room temperature for 1 hour before baking, which gives the apples time to soften and release juices. Once baked, these taste even better the next day—cover loosely with foil and store at room temperature. Reheat in a 350°F oven for 10-15 minutes to restore that gooey perfection.
Why You'll Love This Recipe
- No-Fuss Assembly: I swear by this recipe because it’s basically a grown-up’s apple pie hack—no crust, no fuss. Toss diced Granny Smiths with butter, sugar, and a pinch of cinnamon, then drop the dough on top. Ten minutes later, golden perfection.
- Sweet-Tart Magic: That crisp bite of Granny Smith apples paired with caramelized brown sugar? It’s the kind of flavor combo that makes you reach for seconds. The buttery flaky layers just take it over the top—like dessert and breakfast had a baby.
- Weeknight Workhorse: Between us, this is my go-to for breakfast-for-dinner nights or when I need to feed a crowd without stress. Double the dough, halve the prep—it reheats like a dream and still tastes fresh. (Yes, even on a Tuesday night.)
- Budget Breakfast Win: A single bag of apples and a stick of butter stretch across multiple breakfasts, and the dough uses pantry staples. Honestly, it’s the kind of recipe that makes me feel like I’m feeding people fancy food without breaking the bank.
Step-by-step instructions for skillet apple pie biscuits
Here's how to create flaky, buttery biscuits with a perfect caramelized apple filling—no rolling required.
Prepare the Apple Filling
In a medium bowl, combine the peeled and sliced 4 medium Granny Smith Apples with the 0.75 cup granulated sugar, 0.25 cup packed brown sugar, 2 tablespoons ground cinnamon, 0.5 teaspoon ground nutmeg, and 1 teaspoon salt. Toss everything together until the apples are evenly coated. This sweet-spiced mixture will form the heart of your biscuits.
Add the 1 tablespoon freshly squeezed lemon juice and 1 teaspoon pure vanilla extract to brighten the filling. The lemon juice prevents browning while adding a subtle tang that balances the sweetness. Let the mixture sit for 10 minutes while you prepare the biscuit dough—this gives the apples time to soften slightly and release their juices.
Make the Biscuit Dough
In a large mixing bowl, whisk together the 3 cups all-purpose flour, 1 teaspoon salt, and 2 tablespoons ground cinnamon. I like to use a whisk for this step to avoid over-developing the gluten, which keeps the biscuits tender. Make a well in the center of the dry ingredients.
Cut the 0.75 cup cold, cubed unsalted butter into the well and use a pastry cutter or your fingers to work it into the flour until the mixture resembles coarse crumbs with pea-sized butter pieces remaining. This texture is crucial—it creates those beautiful flaky layers when baked. Pour in the 1 cup room-temperature buttermilk and gently stir with a fork until just combined. The dough will be shaggy, and that's exactly what we want.
Assemble and Bake the Skillet Biscuits
Preheat your oven to 375°F. In a 9-inch cast-iron skillet (or oven-safe ceramic skillet), spread the apple filling in an even layer, mounding slightly in the center. This creates a beautiful dome when baked. Drop spoonfuls of the biscuit dough over the apple filling, spacing them about 1 inch apart. The dough will spread slightly as it bakes.
Bake for 35-40 minutes until the biscuits are golden brown and the filling is bubbling. The edges should be crisp, and the top should have a beautiful caramelized sheen. If you added the optional 0.25 cup heavy cream, drizzle it over the filling during the last 5 minutes of baking for extra richness. The biscuits are done when they sound hollow when tapped on the bottom.
Finish and Serve Warm
Remove the skillet from the oven and let the biscuits rest for 5 minutes before serving. This resting time allows the filling to set slightly, making it easier to slice. The biscuits should be tender with a crisp exterior, and the apple filling should be perfectly caramelized with a soft, custard-like texture.
Serve warm with a dollop of whipped cream or a scoop of vanilla ice cream. The contrast of the warm, spiced apples with the cool cream creates the perfect balance. These biscuits are best enjoyed fresh from the oven when the layers are at their flakiest and the filling is at its peak caramelization.
Pro Tips For Making Skillet Apple Pie Biscuits
- Prep Apples Like a Pro: Slice your Granny Smiths thin—about ¼-inch thick—and toss them in lemon juice right away. The acid keeps them from browning while you mix the dough, and thinner slices cook faster so they don’t turn to mush. (Yes, even if you’re impatient like me.)
- Chill the Dough: After mixing the butter and flour, press the dough into a disk, wrap it in plastic, and refrigerate for at least 30 minutes. Cold butter bakes slower, so your biscuits won’t turn greasy or spread into sad pancakes. I learned this the hard way—flaky crusts aren’t worth the shortcut.
- Brown the Butter First: Melt the butter until it’s nutty and golden, then cool it slightly before mixing into the dough. That extra depth of flavor carries through the biscuits, balancing the tart apples. (Skip this, and you’re basically eating a buttery biscuit—not a showstopper.)
- Layer Apples Evenly: Arrange the sliced apples in a single, overlapping layer—no stacking! The heat needs to reach every slice for even cooking, and a tight pile just steams the bottom while the top stays raw. Think of it like a neat lasagna, not a chaotic dump.
Common mistakes when making this dish
Overmixing the Dough
I’ve seen this happen more times than I can count—especially when people get nervous about handling the dough. The moment you start stirring that buttermilk into the flour, stop as soon as the mixture comes together.
Overmixing develops gluten, which turns your biscuits into dense, chewy hockey pucks instead of flaky layers. Use a fork or spatula and just fold until the dough clumps together. Trust me, it’s shaggy and uneven, but that’s exactly what you want. 🧈
Skipping the Resting Time
Rushing to bake those biscuits right after assembling is a classic mistake. The dough needs time to relax and the filling to soften slightly. If you skip the 10-minute rest for the filling or the 5-minute rest after baking, you’ll end up with uneven baking—some parts crispy, others still doughy.
Patience here makes all the difference in texture and flavor.
Using Warm Butter
Cold butter is your secret weapon for flaky layers, so never, ever use warm or melted butter in this recipe. When butter melts, it coats the flour instead of creating those beautiful, crisp layers.
Cut your butter into small cubes and keep it in the freezer until you’re ready to mix it into the flour. This ensures those pea-sized pieces stay intact until they hit the oven. 🥶
Uneven Filling Distribution
The apple filling should be spread evenly in the skillet, with a slight mound in the center. If you pile it all in one spot, the biscuits on top will bake unevenly—some crispy, others soggy.
Use the back of a spoon to spread the filling into an even layer before adding the dough. This ensures every bite has that perfect balance of buttery biscuit and caramelized apple.
Baking in the Wrong Skillet
Cast iron is non-negotiable for this recipe—it distributes heat evenly and creates that signature crispy edge. Nonstick skillets won’t give the same texture, and glass or ceramic can lead to uneven baking.
If you don’t have cast iron, a heavy oven-safe ceramic skillet is your next best option. Just make sure it’s preheated alongside your oven to avoid temperature shocks.
Ignoring the Lemon Juice
Skipping the lemon juice might seem harmless, but it’s a game-changer. The acidity brightens the apples and prevents them from turning mushy during baking. Without it, your filling can taste flat and overly sweet.
Freshly squeezed lemon juice works best—no substitutes here. A single tablespoon makes all the difference in flavor and texture. 🍋
Nutrition facts
Frequently asked questions
Can I make this recipe with store-bought biscuit dough?
For a quick version, use 12 refrigerated biscuits (like Pillsbury Grands) instead of homemade dough. Press them gently into the skillet over the apple filling, leaving small gaps for the filling to bubble through. Bake at 375°F for 20-25 minutes until golden and bubbling. The texture won't be as flaky, but it's still delicious and perfect for busy weeknights.
What if I don't have a cast iron skillet?
Use a 9-inch oven-safe ceramic or stainless steel skillet instead. Preheat it alongside your oven to ensure even baking. Avoid nonstick pans—they won't create that signature crispy edge. If your skillet is too large, use a 10-inch and reduce the filling by 1 cup to prevent overflow. The key is a heavy, heat-retaining pan.
Can I substitute other fruits for the apples?
Yes! Try peaches (reduce sugar by 0.25 cup) or pears (add 0.5 tsp extra cinnamon). For a fall twist, use cranberries (toss with 0.5 cup orange juice and 1 tsp orange zest). Avoid overly watery fruits like berries—they'll make the biscuits soggy. Stick with firm, flavorful fruits that hold their shape when baked.
How do I store leftovers?
Let the skillet cool completely, then cover loosely with plastic wrap or foil. Store at room temperature for up to 2 days—these taste even better reheated! To refresh, bake at 350°F for 10-15 minutes until warmed through. For longer storage, freeze individual portions wrapped tightly in plastic. Reheat from frozen at 325°F for 20-25 minutes until bubbly.
Why did my biscuits turn out dense instead of flaky?
This usually happens from overmixing the dough or using warm butter. For flaky layers, cut cold butter into the flour until you have pea-sized pieces, then mix in buttermilk just until combined—stop when the dough clumps. Also, avoid pressing down on the dough when assembling. The secret is gentle handling and cold butter!