
Desserts
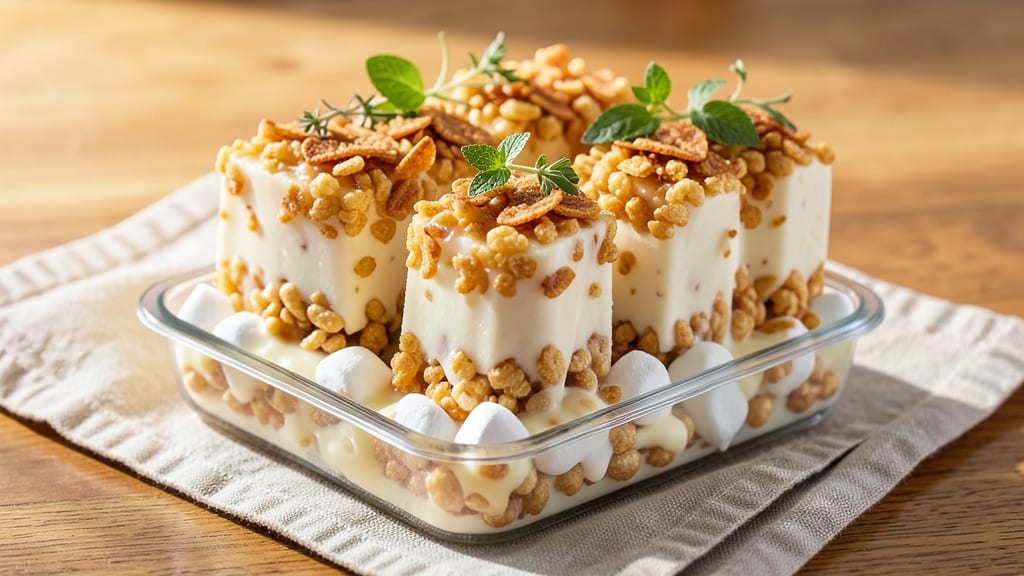
This Rice Krispie popsicles recipe transforms a nostalgic snack into a creamy, crunchy dessert that’s impossible to resist. 🌟 The secret lies in perfectly balanced marshmallow-to-cereal ratios that create pockets of gooey goodness between crisp clusters—no soggy texture here.
I’ve tested countless variations, and this method guarantees a treat that’s as fun to make as it is to eat.
The process is surprisingly simple: melt marshmallows until silky smooth, fold in crispy Rice Krispies until evenly coated, then pour into popsicle molds before freezing. The texture contrast—crunchy exterior, melty center—makes every bite a revelation. For extra flavor, try mixing in cocoa powder, crushed cookies, or fruit purees before pouring.
What you’ll end up with is a dessert that’s perfect for kids’ parties, summer gatherings, or satisfying your own sweet tooth. The popsicles hold their shape beautifully, with just the right amount of crunch to keep things interesting. Serve them straight from the freezer for maximum enjoyment—no waiting required.
This recipe scales effortlessly, so make a big batch and store extras in an airtight container. The possibilities for customization are endless, but the core technique remains foolproof. Let’s get started on creating these nostalgic yet elevated treats!
Ingredients for rice krispie popsicles
Transform nostalgic Rice Krispies into creamy, crunchy popsicles with these carefully balanced ingredients.
| Ingredient | Amount | Notes |
|---|---|---|
| Mini Marshmallows 🍫 | 10 oz | High-quality, evenly sized |
| Rice Krispies Cereal 🍚 | 3 cups | Original flavor, lightly crushed |
| Unsalted Butter 🧈 | ½ cup | Cut into small cubes |
| Vanilla Extract 🌿 | ½ tsp | Pure, high-quality vanilla |
| Heavy Cream 🥛 | ¼ cup | Full-fat for richness |
| Popsicle Molds 🍧 | 12 whole | Standard 3-ounce size |
| Popsicle Sticks 🍬 | 12 whole | Wooden, for easy handling |
| Dark Chocolate Chips 🍫 | ¼ cup | Optional, for drizzling |
| Crushed Cookies 🍪 | ¼ cup | Optional, for texture |
| Cocoa Powder 🍫 | 1 tbsp | Optional, for chocolate flavor |
| Parchment Paper 📄 | 1 sheet | For easy removal |
| Fine Sea Salt 🧂 | ¼ tsp | For sprinkling |
The marshmallows are the heart of this recipe—opt for high-quality, evenly sized ones like Kraft Jet-Puffed or Dandies for consistent melting. Butter and heavy cream add richness, so use full-fat versions for optimal texture. Vanilla extract should be pure, not imitation, for authentic flavor. For the cereal, lightly crush the Rice Krispies in a bag with a rolling pin to create pockets of crunch without overpowering the marshmallow base. If you're customizing, add cocoa powder or crushed cookies to the marshmallow mixture before folding in the cereal for deeper flavor.
No vanilla extract? Almond extract at half the amount works in a pinch, though it has a distinct taste. Substituting butter with coconut oil gives a slightly different texture but works if you're avoiding dairy. For the cereal, any crispy cereal like Corn Flakes or Chex Mix can replace Rice Krispies, though the flavor will vary. If you're making these for a crowd, double the batch and use a silicone mold set instead of traditional popsicle molds. The optional chocolate drizzle or cookie crumbles can be swapped for caramel sauce or fruit purees like strawberry or mango for a fruity twist.
Prevent soggy popsicles by ensuring the marshmallow mixture is completely cooled before adding cereal—this keeps the clusters crisp. Store completed popsicles in an airtight container with parchment paper between layers to prevent sticking. They’ll keep for up to 2 weeks in the freezer, though texture may soften slightly. For serving, run molds under warm water for 10-15 seconds to release popsicles cleanly. These treats are best enjoyed straight from the freezer, so plan ahead for parties or gatherings.
Why You'll Love This Recipe
- Here’s what sold me: I already had the butter, cereal, and marshmallows. The heavy cream? One extra ingredient for a treat that costs pennies per serving. Plus, leftovers? Just pop them back in the freezer—they’ll keep for weeks without losing that magic texture.
- No-Fuss Magic: I swear by this recipe because it’s the kind of dessert that feels like cheating—just melt butter, mix in cereal and marshmallows, and freeze. The heavy cream and vanilla turn it from snack to indulgence, and honestly? Even my picky kids don’t argue when it’s ready.
- Crispy-Creamy Obsession: That perfect snap of Rice Krispies with the gooey marshmallow center? It’s like a grown-up version of childhood nostalgia. The heavy cream adds a silky richness, and the vanilla ties it all together—simple, but ridiculously satisfying every time.
- Party-Ready in Minutes: Hosting last-minute? These popsicles are my secret weapon. They’re easy to batch, freeze beautifully, and look cute in a bowl—no fancy plating needed. Between us, I’ve served them at book club, potlucks, and even as a very impressive breakfast-for-dinner treat.
Step-by-step instructions for Rice Krispie popsicles
Here's the precise method for creating perfectly balanced popsicles with crispy cereal clusters and gooey marshmallow centers.
🍳 Step 1: Melt Butter and Heavy Cream Together
In a medium saucepan, combine the 0.5 cup unsalted butter and 0.25 cup heavy cream over low heat. Stir gently until the butter melts completely and the mixture becomes smooth and glossy. Watch closely—you don't want it to boil or separate. This base creates the creamy foundation that binds everything together.
Once fully melted, remove from heat and stir in the 0.5 tsp vanilla extract and 0.25 tsp fine sea salt. Let the mixture cool slightly for 5 minutes—it should be warm to the touch but not hot. This cooling step prevents the marshmallows from melting too quickly when added later.
👨🍳 Step 2: Combine Marshmallows and Rice Krispies
Working quickly, add the 10 oz mini marshmallows to the warm butter mixture. Stir vigorously with a wooden spoon or silicone spatula until the marshmallows are completely melted and the mixture becomes thick and glossy. You'll see it transform from a liquid into a smooth, pourable consistency—this is your signal to move fast.
Immediately fold in the 3 cups rice krispies cereal using a rubber spatula. Work quickly but thoroughly to distribute the cereal evenly throughout the marshmallow mixture. The cereal will absorb the liquid, creating those signature clusters. If the mixture looks dry, add 1 teaspoon of heavy cream to loosen it—this ensures proper texture before freezing.
🥘 Step 3: Prepare the Popsicle Molds
Line the 12 whole popsicle molds with the popsicle sticks, pressing them firmly into the bottom of each mold. Place the lined molds on a tray covered with the parchment paper for easy removal later. This setup prevents leaks and makes unmolding much simpler.
Carefully pour the marshmallow mixture into the prepared molds, filling each about ¾ full. Use a spoon to smooth the tops—this creates an even surface for freezing. If you're using the optional 0.25 cup crushed cookies or 1 tbsp cocoa powder, sprinkle them lightly over the tops now before the mixture sets. This adds texture and flavor contrast to each bite.
⏰ Step 4: Freeze and Set Properly
Cover the tray of popsicle molds with plastic wrap and place in the freezer. Freeze for 4-6 hours or until completely solid. You'll know they're ready when the edges are firm and the center has a slight give when gently pressed with a finger. This freezing time ensures the perfect balance between crispy cereal and creamy marshmallow.
For added richness, melt the 0.25 cup dark chocolate chips in a microwave-safe bowl in 20-second intervals, stirring between each interval until smooth. Drizzle the melted chocolate over the frozen popsicles just before serving. Let the chocolate set for 5 minutes before unmolding—this creates a beautiful contrast of textures and flavors.
🔪 Step 5: Unmold and Serve
Run a warm knife around the edges of each popsicle mold to loosen them from the sides. Gently tap the bottom of each mold to release the popsicle onto the parchment paper. Let them sit for 1-2 minutes before transferring to a serving plate—this prevents melting from handling.
Serve immediately for the perfect texture contrast: crispy rice krispies, gooey marshmallow centers, and optional chocolate drizzle. These popsicles are best enjoyed within 2 hours of unmolding to maintain their ideal texture. Store any leftovers in an airtight container in the freezer for up to 1 month, though they won't taste as fresh after the initial serving.
Pro Tips For Making Rice Krispie Popsicles
- Melt Butter Slowly: I learned this the hard way—dumping cold butter into the pot and ending up with clumps that refuse to melt. Instead, cut the butter into tiny cubes and let it melt over low heat, stirring constantly until it’s completely smooth. This keeps your mixture silky, not lumpy.
- Use Warm Cream: Cold heavy cream will make your popsicles grainy and uneven. Warm it up slightly—just enough to feel cozy between your fingers—before mixing it in. This ensures the marshmallows dissolve properly and the texture stays creamy, not clumpy.
- Layer Marshmallows Last: I used to toss everything in at once, and the marshmallows would clump into one big glob. Instead, stir in the Rice Krispies and butter first, then fold in the marshmallows after the mixture cools just a bit. This keeps them evenly distributed and prevents a sticky mess.
- Freeze in Shallow Trays: Skip the deep dish—use a rimmed baking sheet instead. It freezes faster, so you can pop out clean, easy-to-remove popsicles without struggling. Just spray with oil first, and your popsicles will slide out like magic (no, not really, but close).
Creative variations of rice krispie popsicles
Chocolate-Dipped Variations
For a decadent twist, melt 0.25 cup dark chocolate chips (or semi-sweet) with 1 tsp coconut oil for a smoother drizzle. Dip the frozen popsicles halfway and let set on parchment paper. I like adding a sprinkle of crushed peppermint or sea salt for contrast. 🍫
Try a white chocolate raspberry version by mixing 2 tbsp raspberry jam into the marshmallow base before freezing. After setting, dip in melted white chocolate and roll in crushed freeze-dried raspberries for a fruity crunch.
Cookie and Nut Mix-Ins
Swap the cereal for crushed graham crackers or Oreo cookies—just 0.5 cup—for a cookie dough-inspired flavor. For extra richness, fold in 0.25 cup chopped pecans or toasted almonds with the cereal. These add a satisfying crunch that pairs perfectly with the marshmallow.
For a peanut butter cup version, stir 2 tbsp powdered peanut butter (like PB2) into the marshmallow mixture before adding cereal. Top with mini Reese’s Pieces before freezing for a nostalgic twist. 🥜
Fruity and Tropical Twists
Add 2 tbsp mango or pineapple puree to the marshmallow base for a tropical vibe. Fold in 0.25 cup diced dried mango or freeze-dried strawberries for texture. These popsicles taste like a summer vacation in every bite. 🍍
For a citrus burst, mix 1 tsp orange zest and 1 tbsp orange juice into the marshmallow mixture. Top with freeze-dried orange peel before freezing. The bright flavors cut through the sweetness beautifully.
Seasonal Holiday Flavors
Celebrate the holidays with cinnamon and nutmeg—add 0.5 tsp cinnamon and 0.25 tsp nutmeg to the marshmallow base. Top with crushed candy canes or gingersnap cookies for a festive crunch. These are perfect for Christmas parties! 🎄
For a pumpkin spice version, mix 1 tbsp pumpkin puree and 0.5 tsp pumpkin pie spice into the marshmallow mixture. Drizzle with melted white chocolate and sprinkle with crushed pretzels for a savory-sweet combo.
Nutrition facts
Frequently asked questions
Why do my rice krispie popsicles turn out too soft?
The most common reason is the marshmallow mixture wasn't fully cooled before adding cereal. Always let the butter-cream mixture sit for 5 minutes after melting to prevent soggy cereal clusters. Also, ensure you're freezing them for the full 4-6 hours—rushing this step leads to icy, soft textures instead of creamy centers.
Can I make these without a popsicle mold? Use silicone ice cube trays or even small paper cups lined with parchment paper. For a fun twist, try mini muffin tins—they create bite-sized treats perfect for parties. Just
What's the best way to store leftover popsicles?
Wrap each popsicle individually in plastic wrap or place them in an airtight container with parchment paper between layers. They'll keep their texture for up to 1 month in the freezer. For longer storage, consider vacuum-sealing them to prevent freezer burn.
How do I fix cereal that sinks to the bottom?
This happens when the marshmallow mixture cools too much before adding cereal. Work quickly after melting the marshmallows and stir gently when folding in cereal to create even pockets of air. For extra insurance, add 1 tsp of heavy cream if the mixture looks too thick—this helps distribute cereal evenly throughout.
Are these popsicles kid-friendly?
Yes! They're a hit with kids because of the fun texture and nostalgic flavors. For extra safety, use short popsicle sticks (or even lollipop sticks) and supervise young children when handling the hot marshmallow mixture. The recipe is naturally sweet but not overly so, making it perfect for after-school treats or birthday parties.