
Desserts
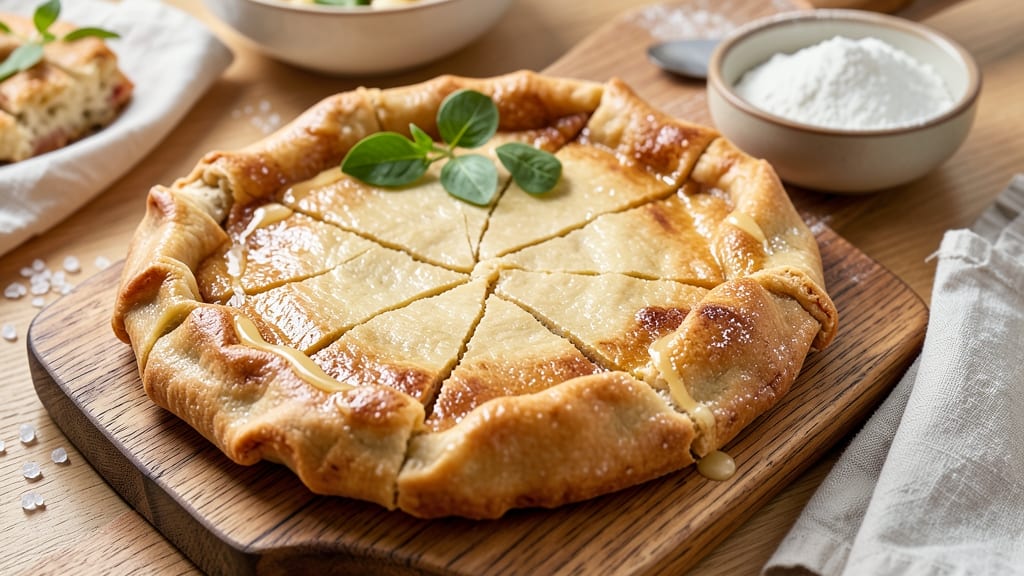
This American pie dough recipe delivers the perfect flaky, golden crust that's the foundation of every classic dessert. The secret lies in cold butter and precise technique—no food processor required.
I've perfected this method over years of baking pies, and it consistently produces a crust that's crisp at the edges yet tender enough to melt in your mouth.
With just five simple ingredients—flour, butter, salt, sugar, and ice water—you'll create a dough that's easier to work with than store-bought versions. The key is keeping everything cold, which prevents the butter from melting and ensures those signature flaky layers.
This recipe works perfectly for apple, pecan, or pumpkin pies, and the instructions are designed to build your confidence even if you're new to pie baking.
What you'll end up with is a pie crust that's sturdy enough to hold your favorite fillings without becoming soggy, yet delicate enough to create that beautiful lattice pattern. The aroma of freshly baked pie filling wafting through your kitchen will make every step worthwhile.
Whether you're making a traditional apple pie or experimenting with seasonal flavors, this dough forms the perfect base.
Once you master this technique, you'll never go back to pre-made crusts. The difference in texture and flavor is night and day, and the satisfaction of creating something from scratch is unmatched. Let's get started on your homemade pie journey—your taste buds will thank you.
Ingredients for american pie dough
Five simple ingredients transform into the perfect flaky pie crust foundation.
| Ingredient | Amount | Notes |
|---|---|---|
| All-Purpose Flour 🌾 | 2 ½ cups | Sifted for light texture |
| Unsalted Butter 🧈 | 1 cup | Cold, cubed, unsalted preferred |
| Ice Water 💧 | ½ cup | Freshly chilled, not tap |
| Granulated Sugar 🍚 | 1 tbsp | White or light brown |
| Kosher Salt 🧂 | ½ tsp | Diamond Crystal preferred |
The butter is everything here—cold and cubed is non-negotiable. Grab the butter from the fridge 10 minutes before mixing so it's firm but not rock-hard. Kirkland Signature or Land O'Lakes unsalted are my go-tos, but any cold, high-fat butter works. The flour? King Arthur or Gold Medal are my pantry staples—they're consistent and reliable. If your kitchen's humid, chill your flour for 10 minutes too. That sugar? It's not just for flavor—it helps tenderize the crust. Domino or C&H are fine, but organic cane sugar adds a nice depth if you're feeling fancy.
No ice water? Freeze a cup of water overnight—it'll be ice cubes you can crush easily. Short on sugar? A pinch of corn syrup (1/2 tsp) keeps things tender. Using salted butter? Reduce the salt to 1/4 tsp—trust me on this. The dough should look shaggy at first, but don't overwork it. If it feels too dry, add 1 tsp more ice water. Too sticky? Chill it 10 minutes and try again. And for the love of pie, don't skip the ice water—it's what creates those perfect flaky layers.
This dough keeps for 2 days wrapped tightly in plastic in the fridge. For longer storage, wrap in foil and freeze for up to 3 months. Let it thaw in the fridge overnight before rolling. Pro tip: divide the dough into two discs now—one for top crust, one for bottom. That way, you're ready to roll when pie time comes. And if you're not using it all? Freeze half immediately—it's perfect for last-minute pies.
Why You'll Love This Recipe
- Three-Ingredient Magic: This dough is basically flour, butter, and water—plus a pinch of salt and sugar—working their best tricks. No yeast, no fuss, just that perfect flaky, tender crunch you dream of in every bite.
- Sweet-Savory Balance: That little spoonful of sugar? It’s not just for show—it caramelizes when baked, giving your pies a subtle depth that butter alone can’t match. Honestly, it’s the secret weapon in my fruit pies.
- Weeknight Wonder: Make a double batch on Sunday, store it in the fridge, and you’ve got pie crust for breakfast tacos, hand pies, or a last-minute dessert—no last-minute stress. My kids’ favorite? Mini apple turnovers for lunch.
- Budget-Friendly Luxury: Cold butter and pantry staples mean this costs pennies per serving, but it tastes like you spent hours on it. Between us, I’ve used this dough for everything from pot pies to cheese straws—always a crowd-pleaser.
Step-by-step instructions for American pie dough
This classic pie dough comes together with minimal effort but delivers that perfect flaky, golden crust every time.
👨🍳 Step 1: Cut Cold Butter into Flour Mixture
In a large bowl, combine the 2.5 cups all-purpose flour, 1 tablespoon granulated sugar, and ½ teaspoon kosher salt. Whisk briefly to distribute the sugar and salt evenly through the flour—this ensures uniform flavor in every bite of your pie.
Next, add the 1 cup cold, cubed unsalted butter. Using a pastry cutter or two forks, work the butter into the flour mixture until you achieve pea-sized crumbs with some larger, uneven pieces remaining. This texture is crucial—it creates pockets of fat that will melt during baking, producing that signature flaky layering.
I press down firmly with my fingers between cuts to ensure the butter stays cold and doesn't start melting prematurely. If the mixture feels too dry, you can add 1-2 tablespoons of ice water later, but start with the exact amount called for—this dough is forgiving but precise.
👨🍳 Step 2: Gradually Add Ice Water for Perfect Dough
Pour the ½ cup ice water over the flour-butter mixture in a slow, steady stream. Use a rubber spatula to gently fold and incorporate the water, being careful not to overwork the dough. The goal is to bring everything together just enough to form a shaggy mass that holds when pressed.
At this stage, the dough should come together when you press it with your fingers, but it shouldn't be sticky. If it feels too dry, add 1 teaspoon of ice water at a time until it just holds together. If it's too wet, sprinkle in 1 tablespoon of flour and knead lightly to absorb the moisture. Remember, this dough should be slightly crumbly—not smooth like bread dough.
Here's a pro tip: I like to use my hands to gently press and fold the dough for about 10-15 seconds—just enough to bring it together without developing gluten. Overworking will make your crust tough instead of flaky. The dough should feel like cold, crumbly cookie dough rather than smooth and elastic.
🥘 Step 3: Shape and Chill for Optimal Texture
Divide the dough into two equal discs (about 2 cups each) and flatten them into 6-inch rounds. Wrap each disc tightly in plastic wrap, then place them in the refrigerator to chill for at least 1 hour. This resting period is non-negotiable—it allows the gluten to relax and the butter to firm up, which prevents the crust from shrinking or becoming tough during baking.
While the dough chills, I like to prepare my pie dish by lightly greasing it with butter or oil. This prevents sticking and makes transferring the dough much easier later. The cold dough is delicate, so handle it gently when you're ready to roll it out—warmer dough is more pliable but loses its flakiness.
For best results, let the dough chill for up to 24 hours if you have time. The longer it rests, the more flavor develops, and the easier it will be to handle. When you're ready to use it, the dough should be cold but still firm enough to hold its shape when rolled out.
🔥 Step 4: Roll and Transfer with Confidence
On a lightly floured surface, roll one disc of dough into a 12-inch circle, about ⅛-inch thick. I use a rolling pin to gently press down, rotating the dough occasionally to maintain even thickness. If the dough resists rolling, let it sit at room temperature for 5-10 minutes—just enough to soften slightly without losing its chill.
Carefully transfer the rolled dough to your prepared pie dish, letting it gently drape over the edges. Trim any excess dough with kitchen shears, leaving about ½-inch overhang for crimping later. The dough should fit snugly in the dish without tearing—if it's too large, gently press down the center to resize it.
Here's where the magic happens: Use your fingers to press the dough lightly against the bottom and sides of the pie dish. This ensures good contact for even baking. If you're making a double-crust pie, repeat the process with the second disc of dough, rolling it out and placing it on top of the filling before crimping the edges together.
Pro Tips For Making American Pie Dough
- CHILL THE BUTTER FIRST: Pull the butter from the fridge 15 minutes before mixing—it should be soft enough to press with your finger but still hold its shape. I used to skip this and ended up with a dough that was either too greasy or too dry, no matter how much I fussed with the water.
- CUT THE BUTTER SMALL: Dice the cold butter into ½-inch cubes, not thin slices. Larger pieces melt slower, giving you more time to work the dough without it turning mushy. (Yes, even if you’re impatient like me—this matters.)
- WEIGH THE FLOUR: Scoop the flour directly from the bag into a scale, then level it off with a knife. Spooning and packing changes the volume, and this dough is finicky about precision. I learned this the hard way when my crust turned out either too tough or too crumbly.
- LET IT REST UNCOVERED: After shaping, let the dough sit at room temp for 10-15 minutes before rolling—no need to cover it. This relaxes the gluten just enough for smoother handling. (Your future self will thank you when the crust doesn’t crack during blind baking.)
Flavor customization for american pie dough
Sweet Variations
Add 1-2 tablespoons brown sugar to the flour mixture for a caramelized crust edge—perfect for pecan or apple pies. I like Light Brown Sugar from Domino for its molasses depth.
For extra richness, replace 1 tablespoon of the butter with 1 tablespoon honey or maple syrup—this creates a subtle sweetness that pairs beautifully with berry fillings. 🍯
Herb Infusions
Boost your crust with 1 teaspoon dried herbs like thyme, rosemary, or sage mixed into the flour. Fresh herbs work too—try 1 tablespoon finely chopped rosemary or 1 teaspoon lemon zest for a bright twist.
These additions shine in savory pies like chicken pot pie or sweet potato pies. I often use Penzeys Spices for consistent quality.
Spiced Options
For a warm, aromatic crust, add ½ teaspoon ground cinnamon or ¼ teaspoon nutmeg to the flour. A pinch of cardamom or allspice works beautifully in spiced fruit pies.
For a kick, include ¼ teaspoon cayenne pepper—it adds subtle heat that balances sweet fillings. These spices are available at Spicewalla if you want premium options.
Cheese Twists
Swap 2 tablespoons of flour for 2 tablespoons grated sharp cheddar or Parmesan for a savory-sweet crust. This works wonderfully in cheesecake crusts or even savory pies.
For a tangy note, try 2 tablespoons sour cream mixed into the dough—it adds moisture and richness that pairs well with fruit fillings. 🧀
Nutty Enhancements
Fold in ¼ cup finely chopped walnuts or pecans to the dough for texture and flavor. These nuts toast beautifully during baking, adding crunch to the crust. For a more intense flavor, toast the nuts first in a dry pan over medium heat for 3-4 minutes until fragrant.
This variation is especially delicious in pecan or apple pies.
Nutrition facts
Frequently asked questions
Can I substitute butter with something else in this pie dough?
While butter is ideal for flaky texture, you can use 1 cup shortening or 1 cup lard for a similar result. For a lighter texture, try ½ cup butter + ½ cup vegetable oil. Just remember: shortening gives the most flakiness, while oil creates a slightly crispier crust. Never use margarine—it contains water that will steam during baking and ruin your layers.
Why does my pie dough keep shrinking when I bake it?
This happens when the dough isn't chilled enough before baking. Always let the dough rest in the fridge for at least 1 hour (up to 24 hours is better). Also, handle it as little as possible—overworking develops gluten, which makes the crust tough and prone to shrinking. Keep everything cold, including your rolling surface and pie dish.
How do I prevent a soggy bottom crust?
Prevent soggy bottoms by pre-baking the crust for 5-7 minutes at 375°F before adding filling. For fruit pies, sprinkle 1-2 tablespoons of sugar or cornstarch on the bottom crust before filling to absorb moisture. Another trick: blind-bake with pie weights or dried beans to create a barrier. Never skip this step for custard pies—it's essential!
Can I make this dough ahead of time?
This dough keeps for 2 days wrapped in plastic in the fridge. For longer storage, freeze it for up to 3 months. Thaw overnight in the fridge before rolling. Pro tip: divide the dough into two discs now and freeze one—you'll always be ready for last-minute pie baking. The longer it rests, the better the flavor develops!
What's the best way to roll out pie dough without tearing?
Keep your dough and rolling surface cold—this prevents sticking. Roll from the center outward, rotating the dough occasionally. If it resists, let it sit at room temperature for 5-10 minutes to soften slightly. Use a light dusting of flour only where needed—too much makes the dough dry. For thick dough, gently press down with your fingers instead of rolling. Patience is key!