
Desserts
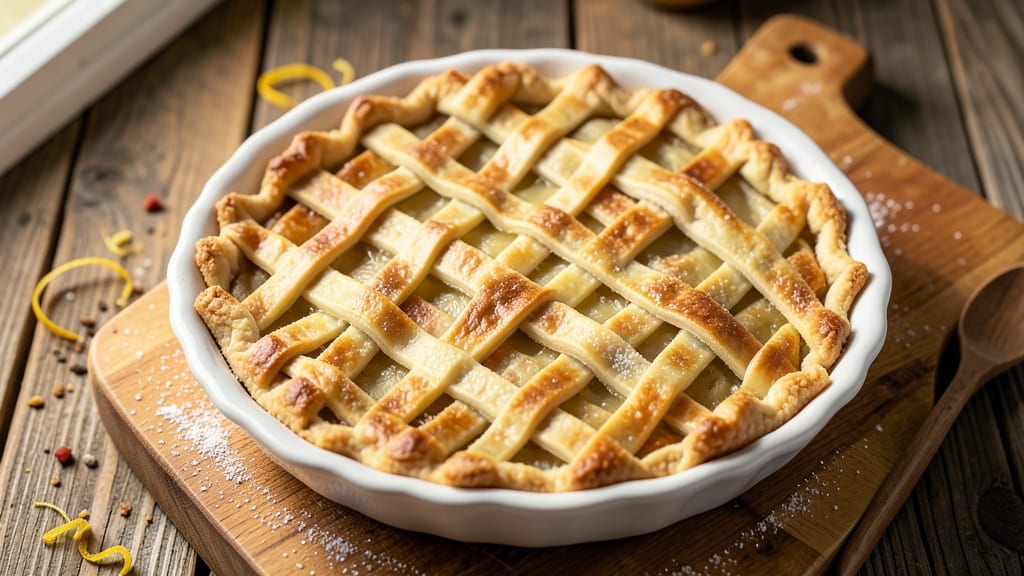
A 12-inch pie crust is the golden foundation of every perfect pie—flaky, buttery layers that hold their shape through baking. This recipe delivers a foolproof method for a classic crust with crisp edges and tender interior, using simple ingredients and precise techniques.
The secret lies in chilling the dough thoroughly and handling it gently to avoid tough texture.
This all-butter crust recipe requires only five ingredients: all-purpose flour, cold unsalted butter, ice water, salt, and a touch of sugar for balance. The butter creates those signature flaky layers when cut into the dough, while the ice water keeps the gluten relaxed for a tender result.
Proper rolling and chilling prevent shrinking during baking, ensuring your crust maintains that perfect 12-inch diameter.
By following these steps, you'll achieve a crust with a delicate crumb and golden-brown finish that's sturdy enough for fruit fillings or savory toppings. The dough is easy to work with once properly chilled, and the final product will impress even experienced bakers.
Whether you're making apple pie, pecan pie, or quiche, this crust sets the stage for success.
For variations, you can substitute some of the butter with shortening for a slightly more stable crust, or add herbs for savory applications. The key to any great pie starts with this reliable foundation—let's get started on creating yours.
Ingredients for 12 inch pie crust
Five simple ingredients transform into a perfect 12-inch pie crust foundation.
| Ingredient | Amount | Notes |
|---|---|---|
| All-Purpose Flour 🌾 | 2 ½ cups | Sifted for even texture |
| Unsalted Butter 🧈 | 1 cup | Cold, cubed, unsalted preferred |
| Ice Water 💧 | ½ cup | Chilled to relax gluten |
| Salt 🧂 | ½ tsp | Diamond Crystal preferred |
| Granulated Sugar 🍚 | 1 tbsp | Balances butter sweetness |
The butter is non-negotiable for flakiness—use European-style butter if possible, like Plugrá or Land O'Lakes, for higher fat content. Cold cubes are critical; let them sit in the freezer for 15 minutes before measuring. The flour should be sifted to remove lumps, and store it in the fridge to prevent gluten development. For best results, use flour from King Arthur or Bob's Red Mill, which have consistent protein levels for pie crusts.
No ice water? Cold tap water works in a pinch, but ice keeps the dough cooler longer. Short on sugar? Skip it entirely—the butter's natural sweetness suffices. If you prefer a slightly richer crust, substitute 1/4 cup of the butter with shortening, though it won't be as flaky. For a savory crust, omit the sugar and add 1/2 tsp dried herbs like thyme or rosemary. The dough should hold together when pressed but not be sticky—add a splash more ice water if needed.
Wrap the dough tightly in plastic and chill for at least 2 hours—overnight is ideal. The longer it rests, the better it'll hold its shape when baking. Store unused dough in the fridge for up to 3 days or freeze for 3 months. To prevent shrinking, roll the dough gently between two sheets of parchment paper, and avoid overhandling. Pre-bake the crust for 15 minutes at 375°F (190°C) to prevent soggy bottoms.
Why You'll Love This Recipe
- No-Fuss Assembly: I swear by this crust—just flour, butter, and ice water. No food processor, no stress. The cold butter cuts in fast with a fork, and the dough comes together smoother than store-bought.
- Buttery Crisp Magic: That flaky, golden edge? It’s all in the cold butter and sugar. The sugar caramelizes just enough to give it this addictive crunch while keeping the center tender. Honestly, I’ll take this over any pre-made crust.
- Every Occasion Crust: Use it for pies, quiches, or even a savory tart. It’s my go-to for holiday desserts, last-minute potlucks, or when I need a quick breakfast. Between us, it’s the only crust I keep on hand.
- Budget-Friendly Staple: Flour, butter, and sugar? Pantry basics. I make two crusts for the price of one store-bought, and they last weeks in the freezer. No waste, no guilt—just endless possibilities.
Step-by-step instructions for perfect 12-Inch pie crust
This method delivers a flaky, golden crust that holds its shape through baking.
Combine Dry Ingredients for Even Texture
In a large bowl, whisk together the 2.5 cups all-purpose flour, 0.5 teaspoon salt, and 1 tablespoon granulated sugar until completely homogeneous. I use a whisk for this step to ensure there are no flour pockets that could lead to tough spots in the crust. Sift the flour first if you're not using pre-sifted flour—this removes any lumps and aerates the dry ingredients for a lighter texture.
The sugar isn't just for sweetness; it helps balance the butter's richness and promotes browning. Don't skip this step—uneven mixing can result in dense patches that won't flake properly during baking. The mixture should look like fine powder with no visible streaks of flour.
Cut in Cold Butter Until Pea-Sized Pieces Form
Add the 1 cup cold cubed butter to the dry ingredients. Using a pastry cutter or two forks, work the butter into the flour until you achieve pea-sized pieces with some flour still clinging to them. This is crucial—overworking will melt the butter and create a tough crust. I press down on the butter with the cutter, then lift and repeat, rotating the bowl occasionally to distribute the butter evenly.
The butter should remain cold throughout this process. If it starts to soften, chill the mixture for 10-15 minutes before proceeding. You'll know you've done it right when the mixture resembles coarse crumbs with visible butter pieces—this creates the flaky layers when baked. Don't be tempted to rush this step; patience here ensures perfect texture later.
Add Ice Water Gradually Until Dough Just Comes Together
With a fork, gradually sprinkle in the 0.5 cup ice water, one tablespoon at a time, mixing gently after each addition. The ice water is essential—it hydrates the flour without warming the butter. Stop adding water as soon as the dough begins to come together when pressed. It should hold its shape when you squeeze a small piece, but not be sticky to the touch.
Real talk: it's easy to overdo the water here. If the dough feels too wet, add a tablespoon of flour and work it in. Too dry? Add a teaspoon of water. The dough should be just shy of being workable—it will firm up as it rests. Don't knead it; just gently form it into a loose disk and wrap it tightly in plastic wrap. This prevents drying and helps develop gluten evenly during the rest.
Chill the Dough for Optimal Texture
Place the wrapped dough on a flat surface and press it into a 12-inch circle, about ¼-inch thick. Wrap it again tightly and refrigerate for at least 1 hour (up to 2 days). This resting period is non-negotiable—it allows the gluten to relax, the butter to firm up, and the dough to firm enough to handle without sticking. I like to place a weight on top of the dough during chilling to flatten it slightly, which helps prevent shrinking during baking.
Cold dough is your friend—it handles better and bakes more evenly. If you're short on time, you can chill it for 30 minutes in the freezer, but don't skip this step entirely. The butter needs time to solidify properly for that perfect flaky texture. When it's ready, it should be cold to the touch and firm enough to roll out cleanly.
Roll and Transfer for Perfect Shape
On a lightly floured surface, roll the chilled dough into a 12-inch circle, keeping the center slightly thicker than the edges. This prevents the crust from puffing up in the middle during baking. I use a rolling pin with guides to maintain even thickness. Transfer the rolled crust to a parchment-lined baking sheet, then carefully fold the edges up to create a rim.
Gently press the rim to form a slight well in the center—this helps prevent the filling from bubbling over during baking. If you're making a double crust, roll the second crust and chill it separately. The key here is to work quickly but carefully to avoid warming the dough. A warm crust will shrink and lose its shape. Once shaped, you can fill immediately or refrigerate the assembled pie for up to 24 hours before baking.
Pro Tips For Making 12 Inch Pie Crust
- Chill the Butter First: Take your unsalted butter out of the fridge 10 minutes before cutting it into the flour—room temperature butter gets greasy and makes the crust tough. I learned this the hard way when my first attempt ended up more like a dense shortbread than a flaky pie crust.
- Cut Butter in Small Bits: Use a pastry cutter or two forks to work the cold butter into pea-sized pieces, not larger chunks. Larger pieces melt unevenly and create pockets of steam that turn into soggy spots. (Yes, even if you’re impatient like me.)
- Skip the Overmixing: Once the dough comes together, handle it as little as possible—just enough to form a shaggy mass. Overworking it develops gluten, and your crust will turn out tough instead of tender. I was skeptical until I tried it; the difference is noticeable.
- Use Ice Water Sparingly: Measure ice water carefully—too much makes the dough sticky and hard to roll, while too little prevents the butter from emulsifying properly. Start with 4-5 tablespoons and add 1 tablespoon at a time until the dough holds together. (Your future self will thank you.)
Creative variations of this 12 inch pie crust
Herb-Infused Savory
Transform this crust into a savory base by omitting the sugar and adding 1 tablespoon dried herbs like thyme, rosemary, or sage to the dry ingredients. For extra flavor, mix in 1 teaspoon garlic powder or ½ teaspoon onion powder.
This works perfectly for quiches, savory tarts, or galettes—just brush the baked crust with olive oil before adding fillings like spinach and feta or chicken and pesto. 🌿
Shortening Swap
For a slightly more stable crust (especially in humid climates), replace ¼ cup of the butter with ¼ cup all-purpose shortening. The shortening has a higher melting point, so it won't melt as quickly during baking, reducing the risk of a soggy bottom.
I find this version holds its shape better when filling with wet ingredients like berries or custards. The trade-off? It won’t be quite as flaky—think "sturdy" instead of "delicate."
Gluten-Free Adaptation
Use a 1:1 gluten-free flour blend like Bob’s Red Mill or King Arthur, and reduce the ice water to ¼ cup. Gluten-free crusts tend to be more fragile, so handle them gently when rolling and avoid overworking the dough.
For extra stability, chill the dough for 2 hours before baking. Brush the baked crust with egg wash (1 egg + 1 tbsp water) to add crispness and shine. 🥧
Sweet Potato Twist
For a vibrant fall option, replace ½ cup of the all-purpose flour with ½ cup sweet potato flour (or finely ground cooked sweet potato). Add 1 teaspoon cinnamon and a pinch of nutmeg to the dry ingredients.
This crust pairs beautifully with spiced apple fillings or pumpkin custards, adding natural sweetness and a lovely golden hue. The texture stays tender but holds its shape well when baked.
Lattice Topping
Roll out the dough as usual, but cut it into 1-inch-wide strips instead of a full circle. Arrange the strips in a lattice pattern over filled pies for a decorative, rustic look. Brush the strips with egg wash before baking to ensure they crisp up nicely.
This technique works for both sweet pies (like berry or pecan) and savory applications (like chicken pot pie). The lattice allows steam to escape while keeping fillings contained. ✨
Pre-Baked Crust Shortcut
Save time by pre-baking the crust for 12-15 minutes at 375°F before adding fillings. This prevents soggy bottoms and lets you assemble pies ahead of time. For extra insurance, sprinkle dried cereal (like cornflakes)** on the bottom crust before filling—it absorbs moisture and adds crunch.
I use this trick for custard pies or when filling with juicy fruits like peaches or blueberries.
Nutrition facts
Frequently asked questions
Why is chilling the dough so important?
Chilling relaxes the gluten and firms up the butter, preventing shrinking during baking. A properly chilled dough (at least 1 hour) maintains that perfect 12-inch diameter and creates those signature flaky layers. Skipping this step often leads to a tough, uneven crust.
Can I make this crust ahead of time?
Wrap the dough tightly and refrigerate for up to 2 days or freeze for 3 months. For frozen dough, thaw overnight in the fridge before rolling. Pre-shaped crusts can also be frozen on a tray before transferring to a bag for easy storage.
What if my crust shrinks during baking?
Shrinking usually happens when the dough warms up before baking. To prevent this, keep everything cold, roll the dough evenly, and avoid overhandling. If it still shrinks slightly, just trim the edges after baking—most fillings will hide any imperfections!
Can I use this crust for savory dishes?
Yes! Simply omit the sugar and add 1 tablespoon dried herbs like thyme or rosemary. This works perfectly for quiches, pot pies, or savory tarts. Brush with olive oil instead of egg wash for a neutral flavor that won't compete with your fillings.
What's the best way to roll out the dough?
Roll between two sheets of parchment paper to prevent sticking, and keep the center slightly thicker than the edges. Use gentle, even pressure—no need to press hard. A rolling pin with guides helps maintain that perfect ¼-inch thickness for even baking.